
As I’d mentioned in a previous post, I recently decided to try my hand at building a PC. As a first-time builder, I found the whole process to be very cost-efficient and rewarding, so I wanted to share my experience.
Budget and Purpose
My budget for the system was around $900-$1000 – excluding the display. For this price, I wanted to put together a decent little mid-range gaming rig for my son that would serve him well for a couple of years before it needed upgrading. It took a lot of research on my part, but I think I assembled a pretty kick-ass little PC. It’s small, it’s fast, it looks great, and I was able to get all the parts for under $1000 (before tax).
Here’s the list of parts used for the build…
The Ingredients
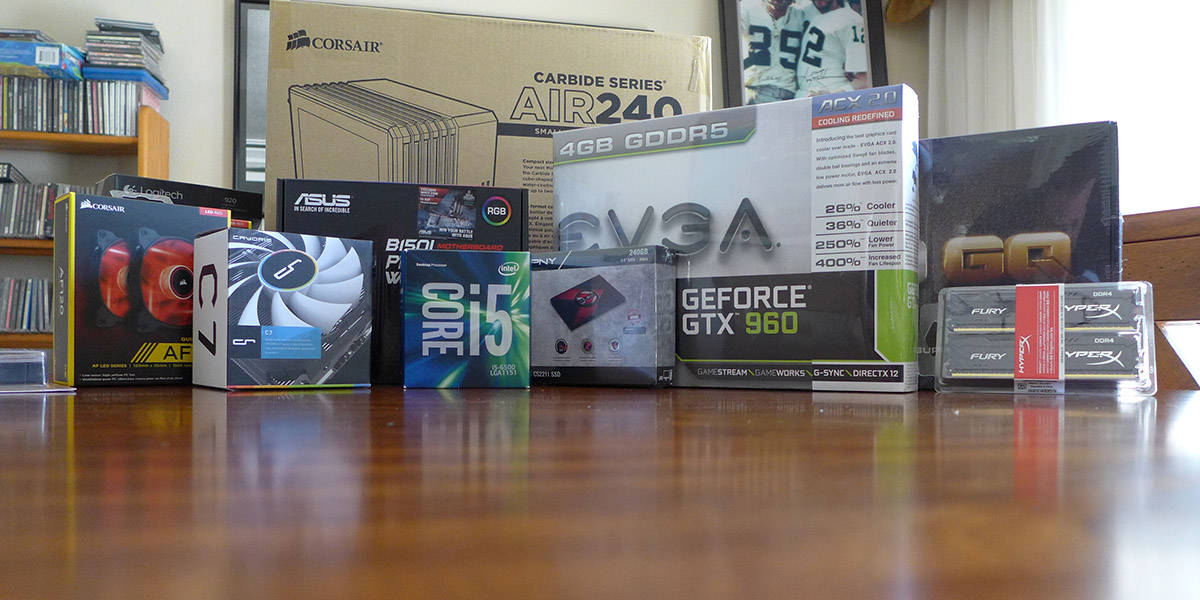
The Case: Corsair Air 240
The case was easily the toughest decision I had to make when planning the build. The case has a lot of influence over the types of components you can install, plus it’s the most visual part of the build. Given that this would be my first attempt at building a PC, I also wanted to be sure I picked a case that would give me little hassle, i.e., be asy to work in and offer good cable management options.
I’d narrowed my choices down to about 5 different cases, and since the PC was going to be my son’s anyway, I let him choose from my five finalists. He immediately picked the Corsair Air 240 and I’m so glad he did! The case is amazing and an absolute pleasure to build in.


I have to give Corsair credit for the expert care they take when packaging their cases. The Air 240 was carefully secured and protected in its shipping box, arriving to me in perfect order.
Processor: Intel Core i5 6500

At around $200, this Skylake processor seemed to sit right in the sweet spot in terms of price and performance. I didn’t want to fuss with any sort of water-cooling, so I figured a locked processor would be ideal (and cheaper).
CPU Cooler: Cryorig C7
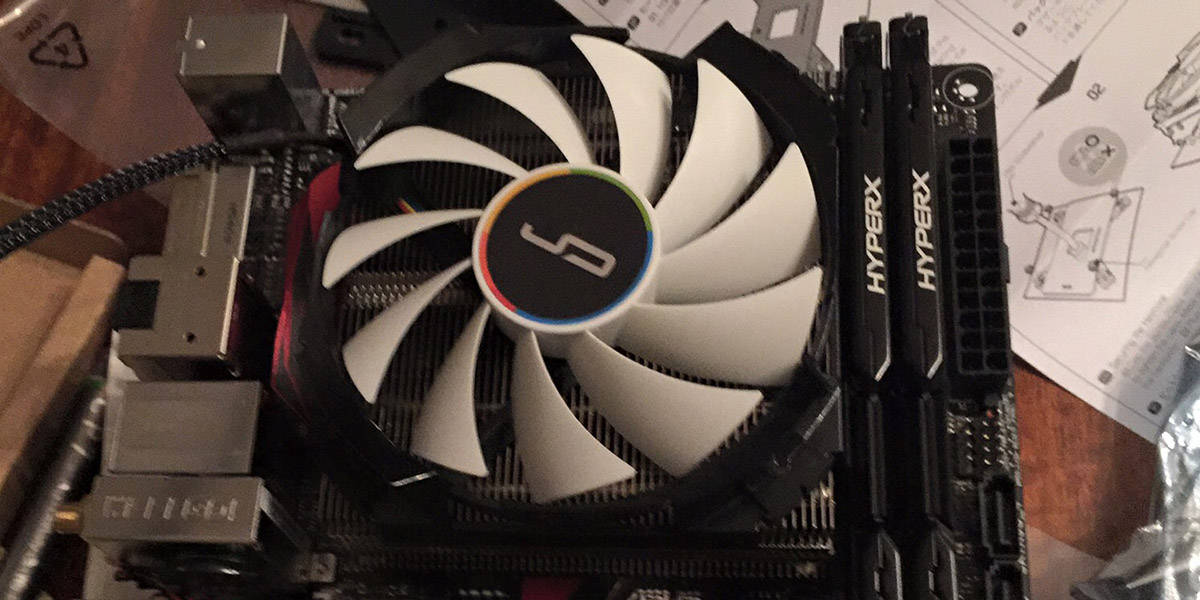
For a few extra bucks, I thought it’d be worth it to throw a more efficient and better looking cooler on the i5 6500, than use the ugly stock Intel cooler it comes packaged with. The Cryorig C7 looks very sharp, it keeps the CPU nice and cool, and it’s very quiet. Totally worth the $30, in my opinion.
Motherboard: Asus B150i Pro Gaming Mini ITX w/ Wi-Fi

Even though the Air 240 can accommodate a Micro ATX board, I elected to go with a Mini ITX mobo. Mini ITX seemed like a good bet because of the built-in wi-fi, and I figured the tiny board would allow for a cleaner and easier build. I also didn’t plan on going with an SLI setup in this rig, and I seriously doubted we’d need more than 32GB of ram anytime soon – both of which were limitations of Mini ITX that didn’t concern me.
Another reason I like a Mini ITX config for the Corsair Air 240 is because it allows for more case fans. Due to the additional size of the Micro ATX board, there isn’t enough space to mount case fans below the GPU. We went with a window-up orientation with the build, and having the six fans wrap around the front and sides of the case looks amazing.
I went with the Asus B150i Mini ITX mobo specifically because of the brand, the features, and the price. The majority of H170 and B150 (non-overclockable) boards with built-in wi-fi are in the $100-$120 range. This ASUS board is a little bit pricier – at about $125 – but considering the quality of the board and the nifty LEDs, I consider it totally worthy of the higher price tag. I also like the wi-fi antenna that comes with this board. The signal strength is excellent and reliable.
Graphics Card: EVGA GTX 960 4GB SSC

One downside of the Corsair Air 240 is its inability to accommodate wider graphics cards. The area between the motherboard and the side window is fairly shallow for a case this size, which means that many cards with larger cooling units and heat pipes will not fit nicely in the Air 240. After looking at several builds using the Air 240, I concluded that an EVGA card was the safest bet. EVGA cards fit in the Air 240 perfectly, with just enough room on the side of the card so the cables can connect comfortably without applying pressure to the plexiglass window.
My budget ceiling was about $200, so I settled on an EVGA GTX 960 SSC with 4GB video ram. The card fits nicely in this build, and being that it came with a backplate, it looks fantastic. I was really hoping to snag a GTX 970 at a deep down discount, but the cheapest I could find, at that time, was around $270. I saw some Zotacs and other B list brands for less, but I was pretty set on an EVGA GPU.
Although I haven’t had any issues with scratching, some Corsair owners have complained about how easily the plastic windows scratch, so be careful when choosing a GPU to stick in this case. You’ll likely want to avoid Asus Strix, MSI, and Sapphire cards, which is a bummer. Some builders have managed to get some wider cards in there, but it usually leaves the side window bowed out due to the pressure, and in time, can result in surface scratches. Apart from EVGA GPUs, I believe Gigabyte Windforce cards can also fit in the Air 240, as well as blower cards like the Asus Turbo.
Memory: 16GB (2x 8GB) HyperX Fury DDR4 2133

I wasn’t too picky with the ram. I wanted sticks that would look good in the build (black or red), at a good price. I basically hovered around looking for deals and snatched these during a sale. I grabbed the pair of HyperX 8GB sticks for $59, plus they came with a free copy of Rainbow Six Siege. That deal was almost criminal.
Hard Drives: PNY CS2211 240GB SSD & PNY CS 1311 480GB SSD
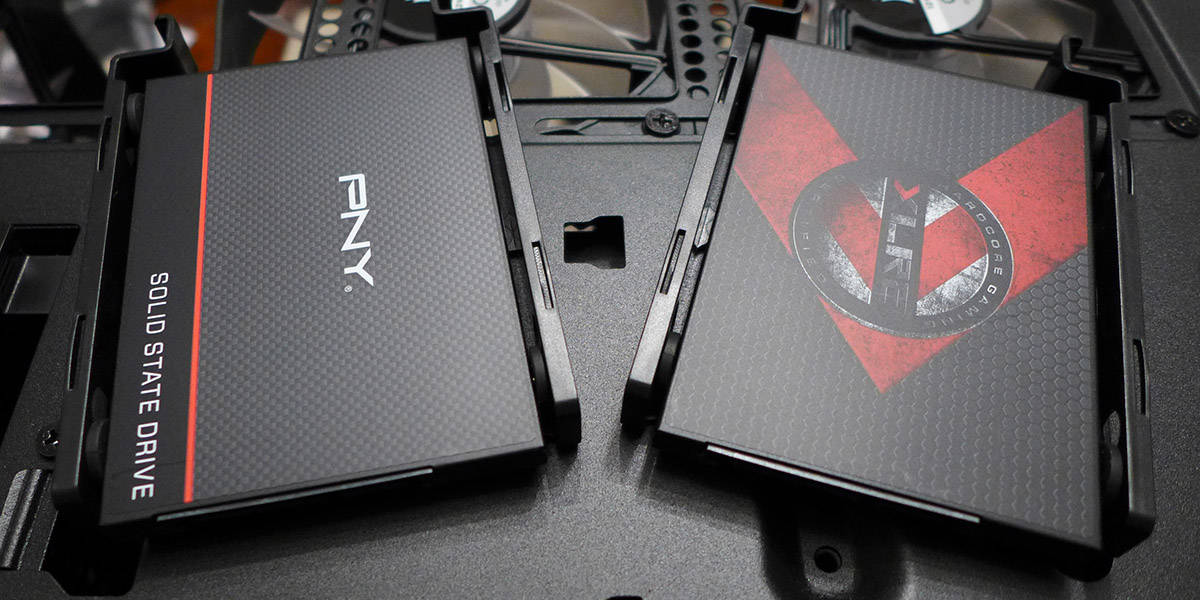
I was going to go with one SSD for the primary drive, along with a 1 TB 3.5″ drive for extra storage, but I managed to steal the 480GB SSD from Best Buy for only $109. The CS2211 I nabbed on sale for $69, which was also an amazing deal. These drives are incredibly fast and I would say they’re easily among the best bang-for-the-buck SSDs available right now.
Also worth noting…the Corsair Air 240 has 6 hard drive bays, so there’s plenty of room to grow.
Case Fans: 6x Corsair AF120 w/ Red LEDs

As its name implies, the Air 240 is ideal for an air-cooled build, with the ability to house up to 9 case-mounted fans (7x120mm + 2x80mm). I figured 6x 120mm fans should be plenty for this moderately demanding little build.
The Corsair AF120s were a great value at around $8 each, they’re quiet, and they really set the build off visually. You’ll see what I mean in the build post.
Fan Hub: SilverStone PWM Fan Hub
For $12, this little beauty enabled me to run all of the fans off the one available fan header on the motherboard.

Power Supply: EVGA 650 GQ 80+ GOLD Semi-Modular PSU
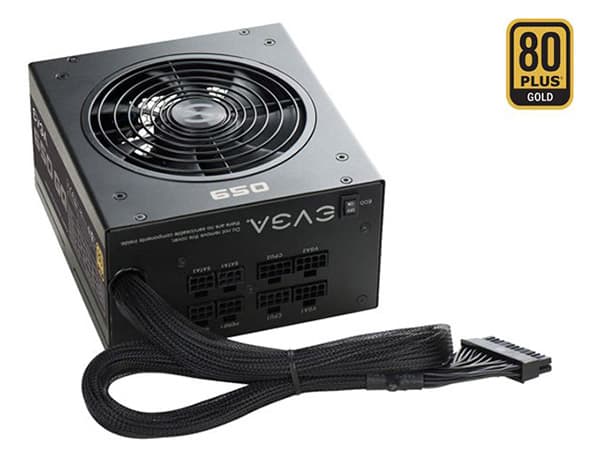
I saw the 650W GQ on Amazon for a pretty good price ($68) and it had glowing reviews on Johnny Guru, so I went for it.
Display: BenQ RL2460HT 24 inch Gaming Monitor
Next to the case, choosing a monitor was the most difficult decision to make with this build. I put this purchase off until the very end – hoping that I’d get lucky and grab an amazing monitor on sale somewhere – but no such luck. Once all of the parts for the PC had arrived, I figured I’d better just go out and grab a monitor so I could put this thing together. If I didn’t like it, I’d just return it and find another I did like.
Although I wasn’t too keen on the shiny piano-black finish, I ended up buying an ASUS VG248QE at the local Best Buy. It was priced right, at $250, and being that it’s an ultra-fast gaming monitor with a high refresh rate and quick response time, it seemed like a good choice for my son’s setup.
After staring at the VG248QE for awhile, I started to get a headache. Now I’m not someone who is prone to headaches, and while it’s possible it could have been coincidence, I’d read that the VG248QE uses PWM (Pulse Width Modulation) for its backlighting which is known to cause headaches for many users. This is a real thing, and if you have any doubts, just Google “asus vg248qe pwm” and you’ll see many comments about it.
Disclaimer: The VG248QE is an extremely popular gaming monitor, which is not necessarily a bad product. The PWM issue is well-known, but it’s also been shown that at least 50% of computer users are not affected by this backlighting technology. If you’re among that 50%, and you want an ultra-fast gaming monitor at a good price, then the VG248QE may be a good choice.
Given that I’m among the users who are affected by the VG248QE’s PWM, I wasn’t going to risk subjecting my son to it, so I returned it the next day. Then it was back to the drawing board…
After experiencing the headache effects of the Asus monitor, I did a great deal of research on backlighting, blue light, eye strain and what not, and ended up deciding on BenQ because of the eye care technology used in their displays. Some of that could be fancy marketing mumbo jumbo, but all I can say is that the 2460HT is a pleasure to look at. The colors may not be as true as my iMac’s 1440p IPS display, but the BenQ is sharp, fast and easy on the eyes.
The build quality is fantastic as well. The display is housed in all black matte plastic, with a subtle red border around the neck of the base. It’s lightweight yet sturdy, and very simple in its design. It also has flexible height and tilt adjustments, plus it can swivel around in a portrait orientation.
At just over $200, I am very happy with this display and I’ve already bought a second one for myself. It’s not as pretty as an IPS display, but what it lacks in color depth it makes up for in performance. Although subtle, it is noticeably more responsive than what I’ve been accustomed to using.
That’s it for the parts. Next up…the assembly.
I really liked the blog. The subject of technology, peripherals, software and apps interests me a lot. He gained a follower.
Congratulations!
Thanks for this detailed guide!